This Spring, why not create a polished yet playful centrepiece at home with a stunning artificial Easter tree? Read on for my quick and easy guide to building your own
Have you ever wondered why celebration trees are confined to Christmas?
The great news is – they don’t have to be!
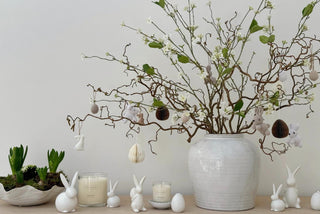
In our home, creating an Easter tree has become something of an annual spring tradition. Built with artificial floral branches and adorned with charming bunnies and eggs, this arrangement has the power to captivate the young – and the young at heart – with its infectious charm. This yearly activity is one of my seasonal highlights and something that brings me even more joy now that our girls want to get involved too.
While I love the concept of an Easter tree, I can’t take credit for inventing it! This tradition actually originated in Germany, where it’s known as an “Osterstrauch.” While its exact origin story is subject to debate, it’s believed to have evolved from the tree of life, an ancient symbol that coincides perfectly with the arrival of spring, a time of rebirth and renewal.


Building the branches
For me, an Easter tree can serve as a seasonal statement piece, especially when it’s on the larger side. I love placing one in our entry way to greet guests and displaying another on our kitchen island so that I can enjoy it every day.
If you’re feeling inspired to create your own, I’m here to help. The best place to start is with a vessel. I love choosing a large white ceramic vase that is proportionate to the branches and ensures their brown tones stand out - our Suffolk Vase would be a great choice.
Now, it’s time to start adding branches. Don’t be afraid to use a mix of different varieties to create a display with visual intrigue. I usually reach for our contorted hazel branches first. I love the distinctive shapes of these pieces and they’re perfect for the base as they’re nice and sturdy and can easily support some of our heavier decorations.
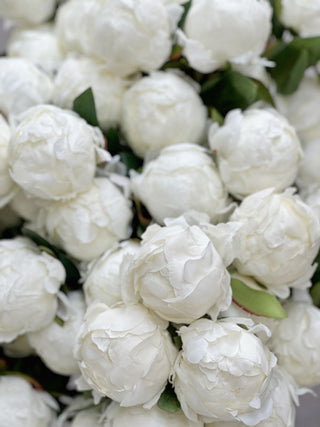
Alongside the hazel branches, I like to add a selection of our faux branches to add interest colour. I love the delicate white and blush blooms of our faux plum blossom, magnolia branches, and cherry blossom.


Time to decorate
Once your branches are in position, it’s time for the fun bit. Adding an array of Easter decorations to your arrangement brings it to life without overpowering your interior décor. Neutral colours and pieces with a crafty aesthetic tend to suit this display well: our delightful crochet bunnies, paper honeycomb eggs, felt rabbits, and crochet eggs are just a few of my favourites.
Choose each piece carefully so that you start to construct a narrative throughout your Easter tree. I suggest mixing your new additions in with treasured family heirlooms to create a unique tree with a deeply personal meaning.
Start with the large decorations first. Take your time and try to space each item so that the arrangement looks natural and random. Ideally, every piece will have space to shine. Once the largest pieces are in place, start to fill in the gaps with smaller items. Keep experimenting, standing back, and looking at your tree from different angles until you’re completely happy with it.
The end result will provide a joyful centrepiece for your Easter celebrations, a spectacular symbol of nature’s abundance and the promise of new beginnings to come.